

Mercury7 editor
Requirements & Setup
In addition to your Mercury7, you need:
- A browser that supports the WebMIDI standard.
- Chrome (recommended)
- Opera
- Edge
- A compatible MIDI interface. The editor has been successfully tested with:
- Meris MIDI I/O
- Disaster Area MIDI-Baby
Changes from the previous version (1.0):
- The preset in the URL is not supported anymore.
- The "history" window (messages) has been discarded*.
- The Controls' description are not displayed anymore*.
(*) this may come back in a future version.
The version 1.0 is still available at studiocode.dev/mercury7-editor-v10/.
Setup
- Configure the Mercury7 for MIDI communication. Consult the Mercury7 user manual for the exact procedure.
- EXP jack mode: MIDI
- MIDI mode: MIDI OUT
- MIDI channel: choose one
- Connect the Mercury7 with the MIDI interface. Be sure to use a stereo (TRS) jack cable.
- Connect the MIDI interface to your computer.
- Open studiocode.dev/mercury7-editor
- Authorize the browser to access your MIDI devices.
- In the editor, select the MIDI input, output and channel.
- Select the same channel you choose in the step 1 above.
- You can ignore the "in 2" input for the moment.
- Move a knob on your Mercury7, the corresponding control in the editor must react accordingly.
- Play some sound through the Mercury7 and move a knob in the editor. The sound should change as if you have moved the same control on the Mercury7.
- Enjoy your Mercury7!
MIDI input no 2
The second MIDI input can be used, for example, to connect an expression pedal or a MIDI controller.
The editor will automatically forward to the Mercury7 the messages it receives on this second MIDI input. It will however ignore the messages that Mercury7 does not support.
You can also use this second input to check the configuration of an external MIDI controler even without a pedal connected to the editor. The received messages will update the editor's controls and thus you'll be able to check that the messages sent by your external controller are valid.
Settings auto-save
The configuration of the editor is automatically saved in the browser's local storage. As long as you use the same browser, you just have to configure the editor once.
Troubleshooting
If you can switch presets from the editor but nothing happens when you move a control, that means the input and output devices are correct but that the MIDI channel is incorrect.
Consult the Troubleshooting chapter at the end of this page if you still have problems making your Mercury7 and the editor work together.
The page resources/meris-pedals-checklist could also help you.
See also the WebMIDI page if you struggle with the WebMIDI configuration in your browser.
Using the editor
MIDI communication
The "in" and "out" texts light up when a MIDI message is send or received.
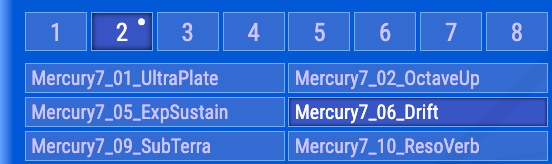
If the Editor is able to communicate with Mercury7, the preset selector will have a light background. In case the Editor is not able to communicate with Mercury7, the preset selector will have a dark background.
Communication with Mercury7 OK:

No communication with Mercury7:
Tooltips:
Tooltips (little informational text box) can be displayed for most of the User Interface (UI) commands.
Click the icon to enable/disable the tooltips:

Global settings:
The Global Settings are locked by default. This is to prevent any unwanted change.
Click the lock icon ( or ) to enable/disable the Global Settings editing.

Important if you have more than one Meris pedal:
If you have more than one Meris pedal connected to the same MIDI interface, it is recommended you do not change the Global Settings while more than one pedal is connected and powered-up.
The Global Settings MIDI messages do not distinguish between different pedals and all the pedals connected to the same MIDI interface will receive and apply the Global Settings messages.
To work around this limitation:
- disconnect or power-down any pedals that you do not want to change.
- modify the global settings of the pedal that is connected.
- reconnect the other pedals.
Init and randomize:
The INIT command resets all the control to some handy predefined values. A future version of the Editor will allow you to choose the default values.
The RANDOMIZE command sets all the controls to a random value.
The INIT and RANDOMIZE commands affect both the normal and the EXP values.
Add current settings to the Library:
You can quickly save your current settings to the Library with the ADD TO LIB command. You can give your preset a name. If you leave the name empty, the preset will automatically be named with the current date & time.
You can rearange the Library Presets by drag & dropping them.
Library scrolling:
The icon enable/disable the vertical scrolling of the Library. This is useful when the Library contains more than 16 presets.
When the Library is open, the first 16 presets are always visible.
Preset modified:
As soon as you change a control, the current preset selector display a dot to remind you that the current settings do not reflect the saved preset anymore.
If you had selected a preset from the Library and you have modified a control, the Library Preset will show a save icon. Click this save icon to update the Library Preset.
![]()
How to set EXP values:
To define the values corresponding to the TOE DOWN position of the EXP pedal, click the "toe" button. As long as the "toe" button is clicked, you modify and view the EXP values.
Keyboard shortcut: pressing the SHIFT key on your keyboard is the same as clicking the "toe" button.
Using the presets library
The Presets Library is a simple tool to manage more than the 16 Mercury7 presets.
It is important to keep in mind that the Library stores the presets in the browser's local storage. It is therefore a good idea to export them as SysEx files if you want to share them across browsers or if you don't want to lose them in case you clear all your browsing data.
A futur version of the Editor will save the Library Presets in the cloud and offer better management features.
Import Mercury7 presets:
This will read the 16 presets stored in Mercury7 memory and save them in the Presets Library.
Import sysex files:
You can import presets stored in files (sysex files, usually with .syx extension).
If you import several files at once, the order you select the files is the order they will appear in the Library. You can sort them in the Library by drag-and-dropping them.
Write presets in Mercury7:
You can write up to 16 presets in Mercury7. A popup window will allow you to choose the range of presets you want to write in Mercury7.
If you want to save them in a specific order, you have to first sort the presets in Library (wih drag & drop).
Export presets as file:
You can export all the Library Presets as a single zip file.
At the moment, you cannot export only one single preset, or a selection of presets, from the Library. This will be available in a future version.
Loading a preset from the Library
When you select a preset in the Library, it is sent to the Mercury7 and replace the current live values of the controls. It does not replace the preset stored in memory. If you want to keep the preset in Mercury7, you have to save it in Mercury7 memory. This is described in the next chapter.
Save a single Library Preset to Mercury7
- Select the preset in the Library.
- Click the SAVE command in the Editor header.
Instead of clicking the SAVE button you can also press and hold the ALT button on the Mercury7.
Library preset icons
![]()
Click the Pen icon to edit the name or the description only.
Click the Trash to delete the preset. A locked preset must first be unlocked in order to be deleted.
Click the Lock Open icon (that appears when you hover over the preset) to protect the preset against modification or deletion.
Click the Lock Closed icon to unlock the preset.
Click the Save icon to update the preset. You can also edit the name or the description. This will overwrite the preset with the current controls' values.
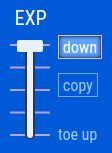
How to use an expression pedal
The EXP slider allows you to simulate an expression pedal connected to the Mercury7.
- The slider's toe up position (slider at 0) corresponds to a opened (toe up) expression pedal.
- The slider's down position (slider at 127) corresponds to a closed (toe down) expression pedal.
The value displayed next to the slider is:
- 0 : corresponds to an expression pedal in the toe up position (default position)
- 100 : corresponds to an expression pedal in the toe down position.
How to set the values for the EXP pedal
- Press and hold the shift key on your compter keyboard. The Editor will show the EXP values.
- While you hold the shift key, any change you do will alter the EXP value.
You can also set the Editor in EXP mode by pressing the TAB key on your computer keyboard or by clicking the "toe" button in the Editor.
While the Editor is in EXP mode, a "copy" button will be displayed below the "toe" button. Use this "copy" button to copy the normal values to the EXP values.
While the Editor is in EXP mode, the control's name are displayed in italic.
When you are done, click the "toe" button again, or press your computer TAB key, to get back to the normal values.
Check your EXP config:
Move the "EXP" slider to morph the controls between the normal and EXP values.
Note: the editor will interpolate the values to show you what the Mercury7 is probably doing. The editor does a linear interpolation and maybe Mercury7 does a different kind of interpolation, so the interpolated value may displayed by the Editor be different from the real value Mercury7 will use.
Please read the Meris Mercury7 User Manual, section 5, for more information.
How to use an external Expression Pedal
You must have a MIDI interface that accept an expression pedal.
- Connect your expression pedal to your MIDI interface
- Configure your MIDI interface to send CC #4 messages to the Polymoon when you move the expression pedal.
- Make sure to send the message on the Polymoon MIDI channel.
You can also use an expression pedal that directly output MIDI messages. Some models are:
- https://lehle.com/FR/Lehle-Dual-Expression : has an USB port that output MIDI
- https://www.boss.info/global/products/ev-1-wl/ : includes both an USB port and a MIDI minijack port
- https://beatbars.com/en/home.html : includes both a MIDI 5-pin DIN port and an USB port
This Expression pedal to MIDI adapter is very useful too: https://beatbars.com/en/expression-to-midi.html
Keyboard shortcuts
| keyboard key | function |
|---|---|
| SPACE BAR | toggle BYPASS |
| Shift | show EXP values |
| Tab | switch to EXP values |
| Alt | show MIDI values |
| I | Init |
| R | Randomize |
| Up arrow | slowly move EXP to "toe" position; press Up again to stop the animation |
| Down arrow | slowly move EXP to "heel" position; press Dowm again to stop the animation |
| PageUp | set EXP to "toe" position |
| PageDown | set EXP to "heel" position |
| Left arrow | previous PRESET |
| Right arrow | next PRESET |
| S | toggle SWELL |
| L | open/close the Library |
| K | enable/disable the Library scrolling |
Startup options
These URL parameters are available:
size=<window-size>
This will force the window size of the editor.
window-size can be:
0orSorsmallfor the small window1orMornormalfor the default window2orLorlargefor the full width window
m=<margins>
This will set the external margins of the editor window.
<margins> must be a valid CSS margin definition. Use %20 to represent the space char in the value.
bg=<color>
This will set the background color of the browser window. By default the color is #111111;
<color> must be a valid CSS color definition.
deletedata=1
Clear all the data saved by the Editor in the browser's local storage.
Troubleshooting
Mercury7 and the Editor are not in sync
If you think the Editor is out of sync with Mercury7 anymore:
- Select a preset in the Editor.
- If the above step did not solve the problem, refresh the page in your browser (F5 or Ctrl-R in Window, Cmd-R in OSX).
- If the editor is still out of sync, check the MIDI configuration. See the next chapter.
MIDI on the Mercury7
If you can't get the MIDI communication working, check the following on the Mercury7:
- The Global Settings EXP MODE is set to MIDI
- The Global Settings MIDI is set to MIDI OUT
- Choose a Global Settings MIDI CHANNEL.
- The cable between the Mercury7 and the MIDI interface is TRS (stereo).
- The MIDI interface is powered on.
- The Mercury7 is powered on.
- The TSR cable is connected between the 4 MIDI interface jack and the Mercury7's EXP/MIDI jack.
- The MIDI interface is connected to your PC.
- The MIDI editor uses the same channel as the Mercury7's MIDI channel defined in the Global Settings.
Check the Meris Mercury7 User Manual and the Meris MIDI I/O User Manual for more informations and instructions about how to set the Mercury7's Global Settings.
Clearing the data saved in the browser
The Editor uses the browser's Local Storage to store the preferences and the Presets Library's presets.
To clear all the Editor's data, start the editor with the deletedata=1 parameter in the URL.
Example: https://studiocode.dev/mercury7-editor/?deletedata=1
Limitations and known issues
This editor will not work in Firefox, Safari, IE or Edge because these browsers do not support the Web MIDI API.
The editor will not work under iOS (iPad, iPhone).
This editor has mainly been tested with Chrome under OSX 10.14. Some tests have been done with success with Chrome under Linux Mint 17.1 and with Chrome under Windows 10.
Known issues
- Selecting a preset with EXP set to max in the editor does not reset EXP when the new setting is loaded.
Thanks
A big thank you to Meris for having provided precious information regarding the SysEx data. This editor could not have been so complete without their support.
Disclaimer and License
This editor is not endorsed by, directly affiliated with, maintained, or sponsored by Meris.
This editor is published under GNU General Public License v3.
This program is free software: you can redistribute it and/or modify it under the terms of the GNU General Public License as published by the Free Software Foundation, either version 3 of the License, or (at your option) any later version.
This program is distributed in the hope that it will be useful, but WITHOUT ANY WARRANTY; without even the implied warranty of MERCHANTABILITY or FITNESS FOR A PARTICULAR PURPOSE. See the GNU General Public License for more details.
You can view and get a copy the license at https://www.gnu.org/licenses/licenses.en.html#GPL.
This editor is an Open Source project. You are welcome to contribute. The code is available at https://github.com/francoisgeorgy/mercury7-web-editor.
To contribute your bug fixes, new features, etc.:
- Fork the project.
- Create a pull-request.
If you like this application, you can 